Quantcast
Channel: Hands On Bike
Viewing all 697 articles
Browse latest View live

Java Freccia Carbon Mini Velo: Part 8 - Panaracer Minits Lite Tires

$
0
0
The Java Freccia carbon mini velo has a fast set of tires, the Schwalbe One 451 tires. It is a narrow set of tires, with a width of just 23mm. This was chosen partly due to the target of building a super lightweight mini velo, which meant that narrower tires are preferred due to the lower weight.

However, one downside of these set of tires is the need to pump them to high pressures. With a maximum tire pressure of 160 PSI, it is necessary to pump these tires to 120-130 PSI for a good ride. Any lower and the tire feels kind of wobbly. At this high pressure, the ride is quite harsh compared to wider tires.

After I recently got the Canyon Endurace, with the comfortably wide 28mm tires, these narrow 23mm tires feel even more harsh in comparison. Besides, I am now convinced that wider tires can also be just as fast. With this in mind, I decided to change to wider tires for more comfort on the Java Freccia carbon mini velo. Note that the tire choice and tire pressure is a much bigger factor in ride comfort than frame material. Therefore, a stiff, harsh frame with a good set of tires at a comfortable pressure will always ride more smoothly than a "forgiving" steel or titanium frame with overly stiff tires.

While searching for suitable 451 tires that are wider, I found that the selection of wider 451 tires is quite limited! For Schwalbe, it is mainly the Durano which has a width of 28mm. However, it is only available in wire bead type which is heavier and also non folding. Tires with wire bead can be more difficult to install onto the rim as compared to those with a folding bead.

Finally, I decided to get the Panaracer Minits Lite 451 tires, which has a width of 28mm. Although these are heavier than the 23mm wide Schwalbe One tires, my priority is now on improving the ride comfort on the mini velo.

These tires are about SGD 35 each from Taobao, which is a good price for tires that are Made in Japan. Of course, don't forget to order suitable inner tubes too. The Schwalbe SV7B inner tubes cannot be used for these new tires as those are only for the narrower tires.

Panaracer Minits Lite 28-451 tires. Hopefully they will give a more comfortable ride!

Close up look at the tire

This tire weighs 201 grams. The previous Schwalbe One tires weighed 162 grams each.

Wider Schwalbe SV7A inner tubes to match the wider tires. Fits a wide variety of tire sizes as shown on the box.

Can even be used for 37mm wide 451 tires!

This SV7A inner tube weighs 98 grams, as compared to the SV7B inner tube that weighs 78 grams each.

Switching to these wider tires and inner tubes will increase the weight of the bike by about 120 grams. When lighter weight is the priority, this makes a difference. However, when comfort is now the priority, the slightly heavier weight is acceptable.

Width of Schwalbe One 23-451 tires was actually about 23.6mm. Quite close to the advertised width of 23mm.

Width of Panaracer Minits Lite 28-451 tires on the same rim gives a tire width of 26.7mm. This is less than the advertised width of 28mm.

Strangely, the actual tire width of the 28mm Panaracer tires is narrower than the specified width. This is uncommon as the actual width is usually wider than the advertised width. For example, the actual width of the Continental Grand Prix 4 Season tires on the Avanti Inc 3 was wider than the specified 28mm width, while the Continental GP4000 tires on the Canyon Endurace was also wider than the specified 28mm width. Of course, this depends on the rim width, but the general trend is for the actual tire width to be wider than the specified tire width.

Comparing the tire width and surface side by side. The new Panaracer tires at the bottom is only slightly wider by about 3mm.

I was expecting the Panaracer tires to be wider by about 5mm, as the width was changed from 23mm to 28mm. However, the increase is less than what I expected. Instead of being bothered by the tire width, I decided to pay more attention to the tire pressure instead.

With the new Panaracer tires, the maximum tire pressure is 100 PSI. This is much more manageable, as I can pump the tires to about 80-90 PSI instead of 120-130 PSI. This pressure is also achievable by a hand pump, as compared to 120 PSI which is very difficult to reach.

New Panaracer tires installed on the Java Freccia mini velo! No big change in appearance.

Tire specifications printed clearly on the side wall.

Same new tire on the rear wheel.

As shown previously, there is plenty of clearance between the tire and the brake calipers. Therefore, changing from 23mm to 28mm (actual 26mm) tires is not an issue.

Plenty of tire clearance with the rear brake caliper

Also plenty of tire clearance with the front brake caliper

One potential problem with these new Panaracer tires is that it seems to pick up more debris from the ground. Hopefully this is just due to the new tire surface, and not pose an issue later on.

Java Freccia carbon mini velo with the new Panaracer Minits Lite 28-451 tires installed! Almost no change in appearance.

After test riding the bike with the new tires, I still need some time to get used to the different riding feeling. Compared to the previous tires, it feels significantly smoother, which causes me to keep checking if I got a puncture or not. Of course, there is no puncture, the difference is due to the more compliant tires which absorbs more vibration from the ground.

At the beginning, the new wider tires may feel slower, as you feel less vibration while riding. However, the speedometer does not lie and still shows a good speed even though there is less vibration. What we need to get used to and understand is that more vibrations does not equal to more speed.

Overall, this is a good upgrade as it reduces the harshness of the previous high pressure tires. Although there is some weight increase, this is OK for me as it is still a lightweight bike, and it still rolls fast with more comfort!

Dahon Vitesse: 2x10 Speed Flat Handlebar Setup

$
0
0
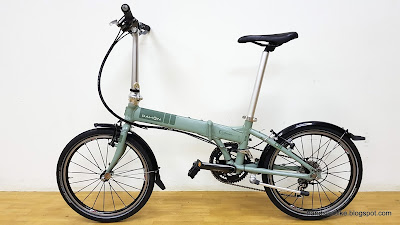
The Dahon Vitesse has come a long way since I started being interested in folding bikes. From the my first Dahon folding bike, the Dahon Boardwalk, to this Dahon Vitesse, I have learnt so much about folding bikes from modifying these two bikes.

Previously, the Dahon Vitesse had a 2x10 speed bullhorn bar setup, which was great for touring or fast riding due to the aerodynamic riding posture. Now, the focus has changed to just normal recreational riding, which means that the bullhorn bars will be removed to get a more compact fold and simpler setup.

This means that the handlebar area and shifters will be changed, while the drivetrain components such as the rear derailleur, front derailleur, cassette, chain, and crankset will remain. At the same time, I will service the bike by cleaning up the components.

One advantage of this setup is that I can revert to using normal V brakes, instead of the long arm caliper brakes which do not give very good braking power.

Using Tiagra 4600 2x10 speed shifters and brake levers for this flat handlebar setup

LitePro stem is still there to mate the flat handlebar to the T type handlepost

Kickstand and mudguards will remain on the bike as they are still very useful

Changed back to normal V brakes for simple setup and good braking function

Same Shimano 105 drivetrain components, no upgrade required

Colour scheme is generally silver and black. Only stock components are the frame, fork and seatpost.

Still a smart looking bike with Shimano 2x10 speed road components

With a flat handlebar, now it folds compactly as well! A definite plus for storage.

With this restoration, this Dahon Vitesse rides as well as a new bike again! Gear changing is smooth and accurate with good braking power. Rolling resistance is minimised with the smooth rolling PZ Racing wheelset, while the Marathon Racer tires are comfortable yet fast.

Canyon Endurace: Selle Italia SLR Titanium Saddle

$
0
0
On the Canyon Endurace bike, the stock Fizik Aliante R3 saddle is a pretty nice saddle. Once the saddle angle has been adjusted properly, it gives great support when riding in the hoods or drops. However, due to the high upsweep of the saddle at the tail end, it gets in the way when I try to sit up straight to hold the top of the handlebar. It is great for riding in the hoods, but not so when sitting up.

The Canyon Endurace comes with a nice integrated handlebar + stem, which is very comfortable to hold at the top, as it is flat and wide which is a good place to rest the palms on. As such, I find myself using the top of the handlebar more often then on other drop bar bikes. Therefore, I need to change the saddle to enable me to sit up comfortably.

On the Merida Scultura 5000 and Java Freccia, I have used the Selle Italia SLR Kit Carbonio Flow saddle, which is both lightweight and comfortable. However, on this Canyon bike, the VCLS seatpost saddle clamp has a side clamping design, which makes it unsuitable for use with carbon saddle rails.

The next lightest and still comfortable saddle would be the SLR Titanium version that has titanium rails instead of carbon rails. This will make it suitable for the side clamping design of the VCLS seatpost. Also, the VCLS seatpost has saddle clamp for round rails, which is also the type that is on the SLR Titanium.

Selle Italia SLR Titanium saddle

Claimed weight is 145 grams, which is just 20 grams more than the SLR Kit Carbonio Flow with carbon rails.

Best of all, it has a red coloured version that seems to match the frame colour quite closely!

Titanium rails on this saddle for lightweight

Simple and clean design at the bottom, with a thin shell to support the thin fabric

Weighs just 141 grams, which is also very lightweight

The red colour on the saddle matches the Kerosene Red of the frame quite closely, with a roughly 90% match!

Due to the setback of this seatpost, I have to set the saddle all the way to the front to get the correct fore-aft saddle position. I don't see an issue since the weight is mostly at the back of the saddle.

New saddle installed on the bike! Lightweight and also matches the frame colour.

With this new saddle, it feels the same as the Merida and Java bikes which also have a very similarly-shaped Selle Italia saddle. Although there is no cutout in the middle of this saddle, it feels fine. Compared to the Fizik Aliante R3, this saddle is very flat, and allows me to sit up straight without being blocked by the tail end of the saddle.

Canyon Endurace: Front and Rear Light Mounts

$
0
0
Although the Canyon Endurace frame is very nice, one problem is finding a proper place to mount front and rear lights. Usually, the rear light is mounted on the seatpost, while the front light is mounted on the handlebars.

However, for this bike, the seatpost is a special VCLS suspension seatpost which needs to flex. As such, I cannot wrap the mount or rubber strap around the suspension area or it will restrict the flexing of the seatpost.

As for the front light, it cannot be mounted on the handlebar as it is an integrated handlebar with no round section to mount the light clamp.

First, let's work on the rear light. I have a Moon Comet rear light which comes with a saddle rail mount, let's see if it can fit.

Weight of the modified Cateye saddle mount with Moon Comet bracket 

Weight of the Moon Comet rear light without any bracket or mount

Installing the Moon Comet rear light onto the rear of the Fizik Aliante R3 saddle, using the saddle rail mount.

Another view of the light installed under the saddle

Light is mounted vertically so that it looks better. Good location for a rear light.

Installing the rear light is easy, as it can be mounted under the saddle. However, for the front, there is no easy solution as the handlebar cannot be used to mount the front light. Luckily, from my experience of working on other bikes, I know that I can actually mount a front light on the fork legs. On the Avanti Inc 3, I managed to mount a Moon Nebula W front light onto the front fork leg, using the new type of mount.

I do have a couple of Moon Comet front lights, bought a few years ago when they were first launched. Even now, they are still working fine, and I really like the glowing LED strips. What I need is the new mount which allows mounting on non-cylindrical surfaces.

Bike31 is the official distributor of Moon lights in Singapore, and they do sell the mounts separately. Once I get the new mounts, I will be able to use them to install Moon front lights onto the front fork legs of the Canyon bike. One thing to take note is that the mount does not come with the rubber strap. This is no big issue as I have many spare rubber straps from the many sets of D-Light front and rear lights.

New type of Moon mount, which enables mounting on non-cylindrical surfaces, such as the bladed shape of a front fork leg.

2 new mounts on top, with the 2 Moon Comet front lights. Rubber straps are from the D-Light lights.

Each set weighs 51 grams, which means a total of 102 grams for a pair.

With the angle adjusted, the pair of Moon lights have been mounted on the front fork legs of the Canyon bike.

This is the only place I could think of to mount front lights on this Canyon bike, due to the integrated handlebar.

With the Moon front and rear lights mounted on the Canyon Endurace, this bike is now ready for night riding. I am especially pleased with the placement of the front lights, because they look good as a pair, with the wide illumination angle ideal for good visibility.

Scott MTB Elite Boa Shoe

$
0
0
For cycling, other than the usual components on the bike, the soft goods (such as gloves, attire, shoes, bags) can also make a difference to your ride. Using good looking and functional soft goods can also become a fashion statement, to let other people know your style.

I have been using SPD shoes and pedals on my bikes since 2012, and it was a good decision as there are many advantages. For more details, just check out this link. My favourite shoes are the Shimano RT82 road touring SPD shoes, which are comfortable and look good. I am not a fan of road shoes as the exposed cleats make it difficult and sometimes dangerous to walk around.

However, I recently discovered that the RT82 SPD road touring shoes have been discontinued, and the replacement shoe is the RT500. I did buy the RT500 shoe to try out, but I did not really like it as it features 3 velcro straps instead of the ratcheting mechanism to tighten the shoe. This makes it rather cumbersome to wear and remove the shoe. Also, it was too boring, being all black in colour.

At the same time, I also tried out the Boa Dial Lacing system on a friend's cycling shoes, and I loved the convenience and adjustability that it brings! It makes it so easy to put on or remove the shoe with one hand, and also allows micro adjustment of the tightness (for higher end Boa Dial models).

Therefore, I looked around for a new cycling shoe that fits the following criteria:
1) Uses SPD cleats (MTB type, not road SPD-SL)
2) Has the Boa IP-1 dial for micro adjustability
3) Sleek looking shape that does not have a too rugged MTB look
4) Some bright colours to make the shoe look less boring

Not many shoes actually fit into these criteria. With the requirement to be a SPD compatible shoe, all the nice looking road shoes are out. This leaves the off-road shoes which are mostly MTB shoes, which look rugged with aggressive treads on the sole.

Adding the requirement for a Boa IP-1 dial narrows down the list even further, to a very limited number of higher end shoes, as the IP-1 dial is the highest level of Boa dial used for cycling shoes.

Finally, I came across this Scott MTB Elite Boa shoe online. This shoe seems to match all of my selection criteria, with an acceptable price (around $150 inclusive of shipping).

Scott MTB Elite Boa shoe, with eye-popping touches of bright orange and green colour.

I like the graphic design on this shoe, with the bright colours added tastefully to the black shoe without overdoing it.

The treads are not too tall, giving this shoe a lower height and also sleeker look compared to most MTB shoes.

As it is ultimately still a MTB shoe, it has some treads for off-road grip, but not with an excessively aggressive design.


The highlight is the Boa IP-1 dial, with the plastic-coated steel wire and the low friction cable guides.

The additional feature of the IP-1 dial compared to the cheaper L6 or L5 dials is the ability for micro-release (turn to loosen). On the other dials, if you want to loosen it slightly, you will need to pull up the dial to release it completely and tighten again.

The arch and metatarsal area is adjustable to fit different sole profiles (high arch or flat foot)

It is adjustable through the use of different inserts at the bottom of the sole insert. However, the shoe did not come with the other inserts (sold separately) and so I could not change them to try out.

Cleat nut on the inside of the shoe, for the cleat bolts to tighten into from the outside.

Shimano SH56 multi-release cleats, and the sticker to cover up the cleat nut on the inside to prevent water getting in. The cleats and the stickers are not included with this Scott shoe.


Just for future reference, this Scott shoe weighs 388 grams (inclusive of cleat nut but no cleats). Not lightweight, but does not really matter.

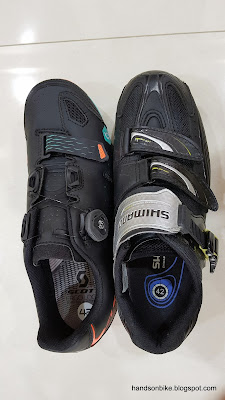
Comparing the length of the shoes (both are Size 42), they are almost the same.

Similar ground clearance and curved shape at the front bottom of the shoe

The Scott shoe has a more divided sole pattern, while the RT82 sole is very simple with no fancy colours or design.

The sizing is spot on for me, as it fits perfectly to my foot. What I really like about this new Scott shoe is how well and comfortable it fits. Normally a new shoe will need a break in period to make it feel comfortable, but this shoe is comfortable from the moment I put it on. The shape and fitting is fantastic!

As for the Boa IP-1 dial, I really like the ease of putting on the shoes. Just slip your foot in (no need to loosen any straps), press down the dial and turn the dial to reel in the wire. Adjust the tightness as necessary by spinning the reel. There are no pressure spots as the pressure is distributed evenly across the foot by the wire and the wide tongue. At the same time it also feels very secure and snug with no loose areas.

Adjusting the tightness on the fly is also possible, just with a small turn of the dial. The micro adjustment comes is super handy here as you can really fine tune the tension to get the perfect balance between security and comfort.

Removing the shoe is even easier. Just pull up on the dial to release the ratcheting mechanism, and pull out your foot. The wire will automatically loosen and allow your foot to be removed, as the ratcheting mechanism in the dial has been disengaged.

The velcro strap at the front does not need to be adjusted or used during normal usage, as it does not affect the wearing or removal of the foot from the shoe. You just need to adjust it one time during initial setup, and then you can leave it alone.

This shoe feels and looks great, and I really like it a lot, even more than the previous RT82 road touring shoes. The colours are exciting but not too flashy, while the fitting and comfort is perfect. Of course, this shoe might not suit everybody, but it works really well for me.

Dahon MuEX: 1x11 Drivetrain - 11 Speed Cassette Modification

$
0
0
The Dahon MuEX has already been upgraded to a full Di2 system, with a hybrid of XTR Di2 and Ultegra Di2 components. The display and the Firebolt shifters are from the XTR Di2 M9050 series, while the rear and front derailleurs are from the Ultegra Di2 6770 series.

With this setup, it is a 2x10 speed drivetrain that covers a good range of gears, as shown below. With a standard crankset of 53/39T, and a close ratio 12-27T cassette, the gear steps between the gears are nice and close. As shown by the blue highlighted boxes, there are 13 unique gears with a gear range of 28.9" to 88.3". This is a good range that is suited to the riding usage of this folding bike.

2x10 speed gear ratios on the Dahon MuEX

On the Canyon Endurace road bike, it comes stock with an Ultegra 6800 11-32T 11 speed cassette, and I will be changing it to a Dura-Ace cassette. As such, I will have a 11-32T 11 speed cassette that I can either sell off or put onto another bike.

One idea that I have is to install this 11-32T 11 speed cassette onto the Dahon MuEX, and turn it into a 1x11 speed bike. There are many advantages to doing this, which I will list down later. The main problem with this idea is that the Kinetix Pro wheelset can only support up to 10 speed cassettes. A 11 speed compatible rear hub will need to have a freehub body that is longer by 1.85mm.

I really like the Kinetix Pro wheelset, therefore I am not willing to give up the wheelset to get a 11 speed rear wheel and drivetrain.

There is a new 11 speed road cassette that is compatible with 10 speed freehub bodies, and that is the Ultegra-level non-series cassette CS-HG800, with a wide 11-34T combination. The largest sprocket is offset inwards on the cassette spider, enabling an 11 speed gear spacing on a 10 speed freehub body. This concept is the same as on 11 speed Shimano MTB cassettes, where it can be used on standard 10 speed freehub bodies.

As this offset gear needs to have clearance with the hub flange and spokes, this offset concept can only be applied to larger sprockets, and in the case of CS-HG800, it is the 34T sprocket. Smaller sprocket sizes may hit the hub flange or spokes, depending on the hub design.

If I use this CS-HG800, it will fit directly on the Kinetix Pro wheelset, turning it into a 11 speed rear drivetrain. However, this will defeat the original purpose, which is to find a use for my 11-32T cassette from the Canyon Endurace.

Another problem that I have is with the gear ratios of the 11-34T cassette.
CS-HG800: 11-13-15-17-19-21-23-25-27-30-34

As shown here, there is a big jump from 11T to 13T. Although it is just a 2 tooth difference, the ratio difference is big due to the small gear size. On a MTB this is still acceptable, as there are big gear ratio differences all throughout the cassette and the riding style is different.

Gearing of CS-HG800 11 speed 11-34T cassette, with a big jump from the 13T to 11T.

However, this Dahon MuEX folding bike will be ridden mainly on the road, and so a big jump in gear ratio will not be suitable. As shown by the table above, the difference in Gear Inches from 13T to 11T is big at 18% and not comfortable for on road riding. My preferred gear combination would probably be something like this, with a maximum difference of 15%.
Preferred 11-34T: 11-12-13-14-16-18-20-23-26-30-34

Even if I wanted to use the CS-HG800 11-34T cassette, I would not have a compatible Di2 rear derailleur to use it with. The 11 speed Di2 rear derailleur that I have is the mid cage Ultegra Di2 RD-6870 which came stock on the Canyon Endurace. This rear derailleur can be used with a maximum sprocket size of 32T, which may still work with the 34T sprocket but is not ideal.

Therefore, I am in a dilemma. I have a 10 speed Kinetix Pro rear hub and a 11 speed 11-32T cassette which I want to use together. These two components are not compatible, unless one of them is modified. I have seen freehub bodies being modified to lengthen the spline section by 1.85mm, but this depends on whether there is actually extra space on the freehub body to allow this. In this case, there is no extra material on the freehub body where the splines can be lengthened by machining away part of the stopper.

No extra material on the freehub body flange that can allow the spline section to be lengthened.

In this case, if I want this to work, I have to find a way to reduce the length of the 11 speed cassette. Is there any possibility of machining away some material on the cassette, so that it can rest further on the freehub body?

There are a few areas that we need to check for clearance, if we want to make the cassette sit further inwards on the freehub body. Depending on the design of the hub and the cassette, these areas will vary, so it is only possible to check with the actual parts in hand.

Clearance between the rivet and the spokes is about 3mm, which is quite generous. Checked with a 3mm Allen key like a Go / No Go gauge.

Further in, there is also some clearance between the J-bend on the spoke and cassette spider. Probably about 2-3mm.

The design of this hub is such that the hub dust cap sits very close to the cassette spider. Only about 2mm of clearance between hub dust cap and cassette spider.

By placing the actual 11-32T cassette onto the freehub body of the Kinetix Pro rear wheel, I was able to check all the clearances. The limiting factor seems to be the clearance between the hub dust cap and the cassette spider, where there is a gap of only 2mm.

If the cassette is modified such that it sits the full 1.85mm inwards, then there will be too little margin and clearance. In this case, my estimate is that I can move the cassette inwards by a maximum of 1.5mm, leaving a small clearance of 0.5mm. This clearance is important during freewheeling, when the hub and cassette are rotating relative to each other.

If that is the case, the lockring engagement length will be reduced, from the nominal 1.85mm to about 1.5mm. Is this sufficient? Let's check.

I found that one sprocket thickness is about 1.6mm. By purposely leaving out one sprocket from the 11 speed cassette, and putting the rest of the cassette on the 10 speed rear hub, it simulates the condition where the cassette is moved inwards by 1.6mm (not the full 1.85mm). At this condition, I can check the lockring thread engagement and also the chain clearance with the inside of the dropout.

Simulating lockring engagement by removing one 1.6mm sprocket from the 11 speed cassette. There is also sufficient clearance between chain and dropout when using the 11T sprocket.

Since there is sufficient clearance, it seems that this project might work! The idea is to machine away some of the material on the spider of the 11 speed cassette, so that the whole cassette can sit further inwards on the freehub body. It will be a delicate balance between spoke clearance and also lockring engagement, as increasing one will decrease the other.

If the project is successful, the 11 speed cassette and Di2 RD on the Canyon will be transferred to the Dahon MuEX!

Once the material on the cassette spider is removed, the entire cassette will rest further inwards, allowing sufficient lockring engagement on the other end. Let's take some measurements to see how much the cassette needs to be modified.

Diameter of flange on freehub body is about 40mm. The cassette spider needs to be larger than this diameter in order to rest further inwards.

On the original cassette spider, there is a protruding step of about 0.7mm, with an outer diameter of about 39mm. This step needs to be removed and a larger counterbore made in order to fit over the flange of the freehub body.

With this engineering drawing, everything should be clear. From the condition on top (before), it needs to be modified to the dimensions below (after).

By removing the original 0.7mm protruding step, and adding a wider 0.8mm deep counterbore, the cassette will sit further inwards by a total of 1.5mm. What this means is that the clearance between the hub dust cap and the cassette spider will be only 0.5mm, while the lockring engagement is also compromised to be about 0.35mm less (1.85 - 1.5 = 0.35).

After machining the cassette spider according to the engineering drawing above, this is the final result. Strength does not seem to be an issue as there is still plenty of material around. Note that flatness is very important, so a lathe is required.

Diameter of the counterbore is more than 41mm, which is sufficient to clear the flange of the freehub body.

Just for reference, the weight has been reduced insignificantly from 280 grams before machining.

Clearance between spoke J-bend and cassette spider seems to be less than 1mm

Clearance between hub dust cap and cassette spider is also very small, at less than 1mm

With the final 11T sprocket yet to be put on, here is the engagement length available on the freehub body. Seems to be quite generous.

After putting on the 11T sprocket, it sticks out above the thread by 0.35mm more than the standard amount. The thread engagement length is thus 0.35mmm less but still looks sufficient.

By measuring the lockring, I found that the standard thread engagement length on the lockring is about 3mm, with a total of about 3 full threads. Since the thread engagement has been reduced by about 0.35mm, this means that there is about 10% less thread engagement. To me, this is still OK as it is not a large amount. As long as I don't over-tighten the lockring, the thread strength should be OK.

With that, this project can be deemed to be successful! I have managed to find a balance between spoke clearance and lockring thread engagement, enabling an 11 speed cassette to be installed on a 10 speed freehub body.

It goes without saying that this voids any warranty that you have on the cassette. It will not work in all cases, it really depends on the rear hub that you have and the cassette that you want to modify. For some rear hubs, it may be easier and more straightfoward to remove material from the freehub body instead of from the cassette spider. On other rear hubs, it may be impossible due to the hub design or insufficient spoke clearance.

11 speed 11-32T cassette installed on the 10 speed Kinetix Pro rear wheel!

This is the most challenging part of this project, to convert 2x10 speed to 1x11 speed on the 10 speed wheelset. Once this is done, the other components should not pose any problem. The rear derailleur and chain needs to be changed to 11 speed, and these components will also come from the Canyon Endurace.

The Di2 wiring will remain, as it is a simple matter of replacing the Di2 rear derailleur. As for the crankset, I will also bring over the Ultegra 6800 crankset from the Canyon Endurace, and convert it to a single chainring.

Depending on the chainring size that you choose, the gear range can be shifted higher for faster riding, or lower for climbing. It really depends on your riding style and fitness. However, the gear range itself cannot be widened or narrowed as it depends solely on the cassette size used.

In this case, using a 48T chainring, on this 20" 406 wheelset will give the gear range as shown in the table below. With a low gear of 30 gear inches and a high gear of 87.3 gear inches, it is almost the same as the previous 2x10 speed setup (28.9" to 88.3"). The difference is only an insignificant 1" loss at either end of the gear range.

New gear table with 11-32T 11 speed cassette and 48T chainring, on 20" wheels.

Some of you may think that a high gear of about 88" is too low for fast riding, but it is actually sufficient most of the time. For fast road riding with road bikes, this will not be sufficient. However, this is on the folding bike where high speeds are not necessary or feasible for me. As already tested on the 2x10 speed drivetrain, this gear range is sufficient.

Just for reference, the Java Freccia mini velo, which is a faster bike than this Dahon MuEX, also has a high gear of 88". If it is enough for the drop bar mini velo, it will be sufficient for this folding bike.

Although the gear range is maintained, it is now spread over 11 gears instead of over 13 gears. Theoretically speaking, the gear steps between gears will be larger. However in actual practice, this is not an issue as they are still close enough for comfortable road riding. If the 11-32T cassette is suitable for the road bike, it will definitely be OK for this folding bike.

If the gear range is maintained, with no other changes, then what is the purpose of going through all this trouble to change from a 2x10 to 1x11 speed drivetrain? What are the advantages?

Advantages of switching from 2x10 speed to 1x11 speed in this case:
1) Gear range is almost the same as before, but with less components.
2) Easier and less confusing gear shifting operation without left side shifter.
3) Lighter weight from removal of left side shifter, front derailleur and double chainrings, even though the larger cassette is slightly heavier.
4) Possibility of longer battery life as the rear derailleur consumes less power than the powerful front derailleur (my guess only).
5) Cleaner wiring setup with the removal of two wires (between left side shifter & display, and between Junction B & front derailleur).

This is a lengthy post, because I want to share the reasoning for changing the drivetrain on the Dahon MuEX folding bike from 2x10 speed to 1x11 speed. Also, modification of the 11 speed cassette to fit on the 10 speed freehub body was also not easy, with many checks necessary to ensure that this project has a high chance of success before making the modification.

It is not done yet! The Di2 rear derailleur and the single chainring crankset has not been installed yet, those will be covered in the next few blog posts.

Dahon MuEX: 1x11 Drivetrain - Ultegra Di2 RD Cage Modification

$
0
0
This project's objective is to convert the drivetrain on the Dahon MuEX from 2x10 speed to 1x11 speed. The most challenging part of this project is to install the 11 speed 11-32T cassette onto the 10 speed freehub body of the Kinetix Pro wheelset. With that successfully done, it is now possible to continue this project.

As the rear cassette gets upgraded from 10 to 11 speed, the Di2 rear derailleur also needs to be upgraded to match the same number of speeds. Unfortunately the rear derailleur cannot be simply reprogrammed to work for 11 speeds, therefore a change is necessary. The current 10 speed Ultegra Di2 RD-6770 will be replaced with the newer 11 speed Ultegra Di2 RD-6870 from the Canyon Endurace.

This Ultegra Di2 RD-6870 is the mid cage version, as it was chosen to be compatible with the 11-32T cassette. The more common short cage version can only work properly up to 28T sprockets.

Not only is the cage length different, the design of the linkage and other parts are also slightly different. This is to account for the different cassette shape as it moves from the smallest 11T to the largest 28T or 32T sprocket. As shown below, most parts are the same, but the Plate Member is different which affects the guide pulley position and movement.

Ultegra Di2 RD-6870: Difference between Mid and Short Cage versions

In other words, if you use a short cage version for a 11-32T cassette, or a mid cage version for a close ratio cassette (such as 11-25T), shifting performance may be compromised. If you have a 11-28T sprocket, I think either the short or mid cage version will be OK.

As for the longer cage on the mid cage version, it is longer because it needs more chain slack capacity, as the chain difference is greater on a 11-32T cassette than on a 11-28T or smaller cassette.

Chain capacity required = (Front max - front min) + (Rear max - rear min)

On the stock Canyon Endurace, the front crankset is 52/36T while the cassette is 11-32T. Using the formula above, the chain capacity required would be (52 - 36) + (32 - 11) = 37T, exactly the maximum that the mid cage rear derailleur can support.

Ultegra Di2 RD-6870-GS, which is the mid cage version. This is different from the short cage version which I had previously.

The mid cage version has a longer cage to increase the chain capacity, allowing it to be used on a drivetrain with a larger difference between the smallest and biggest gears.

At this point, we have verified that the mid cage rear derailleur is suitable for use with the 11-32T cassette. If they are both installed on the Dahon MuEX, they will work fine, and I can move on to the other components. However, are there any other issues, and is there any room for improvement?

One main problem of using mid or long cage rear derailleurs on small wheeled bikes is the decreased ground clearance and tire clearance. Due to the smaller wheels, the rear derailleur cage will be closer to the ground and also the tire. There is usually no issue with ground clearance, as you will not be taking the small wheeled bike off-road onto uneven ground. On flat ground there is no issue with ground clearance, even when going over humps.

However, tire clearance can be an issue, especially if you have wider tires, such as the Schwalbe Kojak. When the rear derailleur is shifted to the lowest gear, it is close to the spokes and also the tire. From my previous experience on modifying small wheeled bikes, using a road mid cage rear derailleur on 20" wheels with wide tires will leave quite a small clearance between the cage and tire. It will still work with no interference, but it gets a bit too close for my comfort.

On a normal drivetrain with a front double crankset, the mid cage is necessary to provide sufficient chain capacity. However, since this will be a front single 1x11 speed drivetrain, the front chainring will always be the same size as there is no front shifting.

Referring to the formula again for chain capacity,
Chain capacity required = (Front max - front min) + (Rear max - rear min)

If the front chainring is fixed at a certain size, the chain capacity thus depends solely on the rear cassette size. 32T (max) - 11T (min) = 21T. Only 21T of chain capacity is required if a front single chainring is used, which can be satisfied even with a super short cage (which does not exist).

In other words, a rear derailleur with a short cage will have sufficient capacity to satisfy a front single setup. In this case, if I take the mid cage RD-6870, and change just the cage to a short cage, I will get a rear derailleur that is compatible with the 11-32T cassette but with reduced chain capacity. This is not a problem for this front single drivetrain, but the advantage is that I get more ground and tire clearance, while it is also a little more lightweight.

Which rear derailleur cage is compatible? From the exploded view diagrams of the RD-6870, you can see what parts are interchangeable or compatible.

Exploded view of the Ultegra Di2 RD-6870. This only shows the user replaceable parts, which are mainly the components of the cage.

From this table, I found that the cage set components (inner and outer plate) are basically interchangeable with the mechanical Ultegra RD-6800 rear derailleur.

Therefore, I will need to cannibalize a short cage from the mechanical Ultegra rear derailleur, RD-6800. If you prefer, you can order spare parts from Shimano, and buy just the short cage set. However, this is more troublesome and you have no idea how long this part will take to arrive.

Short cage mechanical RD-6800 on the left, mid cage Di2 RD-6870 on the right. The idea is to move the short cage over.

To swap the cage set, the bolt shown here needs to be removed to detach the cage set. Before that, the guide pulley needs to be removed to access this bolt.

Before dismantling the mid cage Ultegra Di2 RD-6870, it is weighed for reference. About 268 grams with the mid cage.

Mid cage parts dismantled from the Di2 RD-6870

Short cage parts dismantled from the mechanical RD-6800

As the cage parts are compatible and similar, it is a straightforward swap. With this modification, I get a short cage Di2 RD-6870 that is capable of shifting well even up to a 11-32T cassette. The other combination (mechanical RD-6800 with higher chain capacity, but is only compatible up to 11-28T cassette) is not that useful, although it can still be used normally, just with a longer-than-necessary cage.

Special edition Ultegra Di2 RD-6870 with a hybrid of mid cage design and short cage capacity.

With the short cage, the rear derailleur looks more compact

After changing to the short cage, this rear derailleur now weighs about 10 grams less at 258 grams.

The objective of going through all this hassle is to get a short cage version of the Ultegra Di2 RD-6870 that can shift well up to the large 32T sprocket. It will have better tire and ground clearance when installed on the 20" Dahon MuEX folding bike.

After completing the modification of the 11 speed 11-32T cassette, followed by this special edition rear derailleur, the next step is to convert the Ultegra crankset to a front single crankset.

Dahon MuEX: 1x11 Drivetrain - Wolf Tooth 48T Chainring on Ultegra 6800 Crankset

$
0
0
After successfully modifying the 11 speed 11-32T cassette and the Ultegra Di2 rear derailleur, the only component remaining that needs to be prepared is the front single crankset.

The Dahon MuEX currently has a 2x10 speed drivetrain, and it is using the Ultegra 6700 53/39T crankset that is designed for 2x10 speed. Converting it to a single chainring is easy, as I will just need to get a narrow wide chainring that has a 130mm BCD to fit the crank arm.

However, I decided to use the newer Ultegra 6800 crankset from the Canyon Endurace instead. Function wise, there should be no difference regardless of the crankset used. In this case I prefer to use the Ultegra 6800 crankset as it will be of the same series as the Ultegra Di2 RD-6870.

Picture taken from a magazine. Looks good!

What I will require will be a narrow wide chainring, to replace the double chainrings on the Ultegra 6800 crankset. As previously tested successfully, the Wolf Tooth narrow wide chainring is an excellent choice. The 4 arm design of the chainring matches the 4 arm crankset quite nicely, while the narrow wide teeth design eliminates chain drop issues.

For this bike, I decided to go with a 48T chainring, which will give me a similar gear range as the 2x10 speed setup when used with the 11-32T cassette. This chainring size was not available in the Shimano road 4 arm design until recently, which was what allowed this project to proceed.

Wolf Tooth 48T narrow wide chainring, designed to fit the Shimano road 4 arm crankset.

Specifications laser marked onto the chainring for easy identification

Narrow wide teeth design improves chain retention, eliminating the need for a chain guard to prevent chain drops.

Thicker chainring bolt mounting area to allow the bolt head to be recessed, while also improving appearance with the crankarm.

Slight appearance difference with the older 44T chainring, as there is no step but instead has a smooth transition between the hole and the teeth area.

Weighs 103 grams. Not much lighter compared to the Hollowglide chainring.

Red anodized aluminium chainring bolts by LitePro.

Perfect chainring nut length. Just below the flat surface where the bolt head will rest on. A little grease helps to prevent the threads from seizing.

Chainring and bolts installed!

Looks super good! Black chainring on the dark grey crankarm, with red chainring bolts to match the other red highlights on the Dahon MuEX setup.

Right side crankarm set weighs 441 grams

No change to the left side crankarm, weighs 197 grams including the plastic crank arm fixing bolt.

This gives a total crankset weight of 638 grams, which is an average weight for a front single crankset. There are lighter setups out there, some of which may actually be cheaper, such as those from LitePro or Ridea. However, I still prefer to use the Ultegra crankset to match the Ultegra rear derailleur.

Since all the 3 key components have been prepared (11-32T cassette, Ultegra Di2 rear derailleur, 48T front single crankset), the next step would be to install all these components onto the Dahon MuEX. Check out the details of the installation in the next blog post!

Dahon MuEX: 1x11 Drivetrain - Installation

$
0
0
Finally, after preparing the 11-32T 11 speed cassette, the short cage Ultegra Di2 rear derailleur, and the front single Ultegra 6800 crankset with Wolf Tooth 48T chainring, it is time to assemble all these new components to the Dahon MuEX!

It was already set up with a 2x10 speed Ultegra/XTR Di2 system, so there is no need to start from scratch. The advantage of having a Di2 setup is that it is modular. So if you just need to upgrade the rear derailleur, just unplug and replace the rear derailleur, and you are done! No need to change the shifters or the Di2 wires.

In this case, since I am going from a front double to front single drivetrain, the front derailleur can be removed, along with the left side shifter. The new Di2 wiring layout is shown below.

New 1x11 speed Di2 wiring layout. No more front derailleur or left side shifter.

Once everything is connected, the Di2 setup box SM-PCE1 can be connected to the system to update all the Di2 components. This ensures that the latest firmware is used and all the components are compatible with one another.

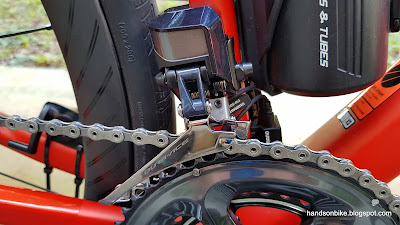
Previously, when the Ultegra Di2 front derailleur was installed, a 2.5mm spacer had to be placed under the right side bottom bracket cup to prevent the crankarm from touching the front derailleur. Now, without the front derailleur, there is no need for this spacer.

Red 2.5mm spacer under the right side bottom bracket cup can be removed.

Ultegra 6800 crankset with Wolf Tooth 48T chainring installed! Looks really good with the red chainring bolts.

Close up look of the interface between the chainring and the crankarm.

Front derailleur removed!

Ultegra 6800 11-32T 11 speed cassette installed!

Special short cage edition Ultegra Di2 RD-6870 rear derailleur for 11-32T cassette. Very ample tire and ground clearance.

Chain path when in the rear low gear. Rear derailleur cage is not over stretched even though it is a short cage, because there is only one front chainring.

Good clearance between cage/chain with tire

Another view of the clearance.

Setting the chain to the rear top gear puts the chain in the smallest sprocket, closest to the frame. Still ample clearance between chain and frame.

Chain path when in the rear top gear. Rear derailleur cage is slightly extended to maintain some chain tension to minimize chain slap.

Another view of the Di2 rear derailleur on the cassette.

Handlebar gets tidied up a bit, without the left side shifter and the Di2 wire between the left side shifter and the display.

Now it is 11 speed as shown on the display! I love the digital gear display, like how I first tried it on the Dahon Boardwalk Di2.

The bell can be mounted at the left side handlebar area, inverted for a neater look. Activate the bell by pulling the bell lever with the index finger, similar to how a shifter is operated.

No interference between the bell and other parts when the handlebar is folded down

Sufficient clearance for the bell when the bike is folded

View of the folded Dahon MuEX 1x11 speed

For practical reasons, a kickstand is added to the bike despite the additional weight. Kickstand weighs about 157 grams.

Revised bike specifications, with the new 1x11 speed Di2 setup. Weight without pedals is reduced from 8.7 kg to 8.4 kg.

This setup has already been tested at the recent OCBC Cycle 2017, and there is no problem! The gear range is sufficient for climbing and also a bit of downslope pedaling. Of course, if you wish to pedal fast down the Sheares bridge slope, the gearing is not high enough. On all other days, this gearing is sufficient 99% of the time.

Gear shifting has been simplified, as there is just one shifter to shift across the 11 speeds on the rear cassette. The overall bike weight has also been reduced, due to the removal of the left shifter, front derailleur and second chainring. Even though the wide range cassette is slightly heavier, overall weight loss is still about 300 grams. Lastly, I get to utilize the components that were removed from the Canyon Endurace, using it to convert this Dahon bike to 11 speeds.

Canyon Endurace: Dura-Ace Road Hydraulic Di2 Shifter ST-R9170

$
0
0
There are 4 types of road shifters in the new Dura-Ace R9100 series. With two types of shifting (mechanical or electronic), and two types of braking (rim or hydraulic brakes), it gives 4 different combinations, which will suit anyone regardless of your shifting or braking preference.

The most premium combination is the electronic shifting, hydraulic disc brake version, which has the model number ST-R9170. Combining Di2 shifting with road hydraulic disc, it features effortless shifting and braking. Also, it is the only version not to use any steel inner cable for shifting or braking. Replacing the shifter inner cable is the Di2 electrical wire, while replacing the brake inner cable is the hydraulic brake hose.

These shifters will be replacing the non series ST-R785 that came with the Canyon Endurace road bike. The ST-R785 is the first generation of Di2 shifting/hydraulic braking road shifter, while this Dura-Ace ST-R9170 is the second generation. My plan all along was to upgrade the groupset to a full Dura-Ace groupset, from the stock Ultegra Di2 6870 groupset that came with the bike.

Handsome looking Dura-Ace ST-R9170 road shifters, with a very high quality finishing on the levers.

Another view of the new shifters. The lever shape has been subtly refined from previous generations.

Overall shifter shape is very similar to other shifters in the same Dura-Ace R9100 series, which is done by totally redesigning the shifter.

Another overall view of the ST-R9170

Due to the resin Bracket construction, the shifter weighs only 160 grams per side, giving a total weight of 320 grams per pair. This is very lightweight!

The Di2 shifter buttons have been increased in size compared to older Di2 shifters. The clicking feeling has also been enhanced for a better tactile feel.

Electronic button unit looks to be quite well integrated into the lever.

This textured area at the top of the hood hides a button underneath! This button can be programmed to perform shifting functions or control other devices such as the Garmin computer.

Hydraulic hose attaches to the rear of the shifter. Titanium clamp band for weight savings.

From the outside, the shifter looks very ordinary, as the rubber hood hides all the interesting bits underneath. However, once the rubber hood is removed, it looks much more interesting!

With the hood removed, the Bracket design can now be seen. The small box is where the Di2 wire will connect to. This box is linked to the top button by a wire...

...while the top button is linked to the shifter buttons below by another wire running through the area shown above.

Bleeding this hydraulic shifter requires an adapter (included) to enable the standard bleeding cup to reach the bleeding port on the shifter. This is because the bleeding port on the shifter is located on top, in a recessed area.

Slot on side of Bracket to guide the cam of the hydraulic piston, for a Servo-wave effect.

One thing you notice is how many ribs are used to strengthen the Bracket and yet keep it lightweight! This is only feasible as a molded resin bracket (nylon + carbon fibre) is used. These ribs also make removing and replacing the rubber hood very difficult.

Located at the bottom of the shifter are the free stroke adjustment bolt (on right) and the lever reach adjustment bolt (on left).

Hydraulic piston slides along the internal bore of the Bracket when the brake lever is activated.

A quick comparison of the new Dura-Ace ST-R9170 with the older ST-R785. The lever shape is noticeably different, with the Dura-Ace lever having the same curved shape as the mechanical road shifters.

The new Dura-Ace shifter is also lower in height, which makes the new shifter look much smaller in size. This is possible only due to a new hydraulic brake design.

In a separate post, the ST-R9170 and the ST-R785 will be compared in greater detail. From what I can see, the main differences by making this upgrade is a slimmer looking shifter and also lighter weight. Ergonomics will be similar to other road shifters with Di2 or mechanical shifting, while the tactile feeling of the Di2 buttons will be improved.

Shimano Dura-Ace Road Hydraulic Mechanical Shifter ST-R9120

$
0
0
Road hydraulic disc has been gaining popularity in the recent years. With improved braking performance and modulation, it is no wonder that more riders are choosing to go with hydraulic disc brakes instead of conventional caliper rim brakes.

As such, the types of road shifters used must also evolve to match the new braking system. There are two types of shifting systems: Mechanical shifting which uses steel inner cables to activate the front and rear derailleurs, and electronic shifting that uses electrical signals to activate the motors in the front and rear electronic derailleurs.

Today's post will be about mechanical shifting together with hydraulic disc brakes. For such a road shifter, it will need to incorporate the shifting mechanism as well as the hydraulic brake mechanism within the road shifter. This is a big challenge as these parts take up space and it is hard to squeeze both of them into the limited space of the road shifter.

For Shimano, the first generation of such a shifter is the non series ST-RS685, more details which can be found at this post created two years ago. Now, there is an official Dura-Ace version of such a shifter, which has a model number of ST-R9120. This is the second generation design, therefore it will be more refined and probably with significant improvements.

Let's take a look at this Dura-Ace ST-R9120 road shifter, which is used for mechanical shifting and hydraulic disc brakes. A detailed comparison with the first generation ST-RS685 will be made later in a separate post.

ST-R9120, weighs 265 grams for one side. A pair will thus weigh 530 grams, which is significantly heavier than the rim brake version which is 365 grams per pair.

With the rubber hood stripped off, the Bracket of the road shifter can be seen clearly. This is the "outside" which is facing the outside of the bicycle.

The "inside" of the shifter.

The biggest difference from the first generation ST-RS685 is that the Bracket material has been changed from aluminium to resin for weight savings.

The front part of the shifter is where the reservoir is located, with the "piping" for the hydraulic fluid machined within the resin Bracket. Bleeding port is located on top.

The rear of the shifter where the hydraulic hose will be connected. Note that this thread is a special M9x1.25 size! Not the usual M8 x 0.75 thread. Clamp band is made of titanium.

Rubber damper for the lever is inserted from the side. Other cutouts are there to secure the rubber hood onto the Bracket.

Similar to other mechanical shifters, the inner cable is inserted from the side. Bracket is made of nylon with a mix of carbon fibre for strength. Silver bolt on top of the Bracket is for adjusting the free stroke, although the adjustment range is very small.

Lever mechanism is similar to other road shifters, while the steel plates now have a black surface treatment instead of silver colour.

Bolt in the centre is used to adjust the reach of the lever, which is separate from the free stroke adjustment.

Without dismantling the shifter any further, this is all that can be seen from the outside. On its own, it is quite amazing that both the shifting mechanism and the hydraulic mechanism has been squeezed into this road shifter without making it too bulky. In a separate post, this new ST-R9120 will be compared to the ST-RS685 to see what has been changed from the first generation.

Shimano Road Hydraulic Disc Brake Mechanical Shifters: ST-R9120 vs ST-RS685

$
0
0
There has been two generations of road hydraulic shifters, with the first being non series, and the latest being part of the Dura-Ace series. For the mechanical shifting version, the first generation ST-RS685 is now used on many cyclocross bikes or road hydraulic disc bikes. The improved, second generation version is the Dura-Ace ST-R9120 which is engineered to be more lightweight.

ST-RS685 weighs 324 grams per side, giving a weight of 648 grams per pair. This is heavy, mainly due to the aluminium Bracket.

ST-R9120 is lighter in weight, weighing 265 grams per side, for a total weight of 530 grams per pair.

Release lever of ST-R9120 on the right has been slightly increased in size for easier activation.

ST-RS685 on the left is non series, with the Shimano logo on the lever. The new ST-R9120 on the right has the Dura-Ace logo, with a superior surface finishing.

View from the front shows that the curve of the lever is similar, but the ST-R9120 has a slightly wider lever shape near the top.


The hood shape is slightly different, with ST-R9120 at the front having a more rounded hood that is slightly lower in height.

From the front, the difference is obvious. ST-R9120 on the right is lower in height but slightly wider, which gives the impression of a smaller hood size.

Inside view of the Bracket. ST-R9120 on the right uses a resin Bracket, and you can see the cylindrical shape of the hydraulic system.


Rear view of the shifters show that the ST-R9120 on the left is slightly wider in size but also shorter in height.

Upon removing the rubber hoods, more differences can be seen. ST-RS685 on the left has an aluminium Bracket, while ST-R9120 on the right has a resin Bracket.

View from the other side. ST-RS685 uses metal pipes for the hydraulic system, while ST-R9120 on the right does not.

From the top, we can see that the new ST-R9120 on the right has the piping concealed within the resin Bracket, instead of being separately created via metal pipes.

ST-R9120 on the left has a different thread size, which is M9x1.25. This is different from the standard M8x0.75 that is used on other most Shimano brakes.

Main difference between these two shifters is the material used for the Bracket, which directly affects the weight. The hydraulic design has also been tweaked to eliminate the need for metal piping, and instead route the hydraulic fluid within the resin Bracket itself. All these improvements lead to weight savings and also a smaller overall size.

Shimano Road Hydraulic Disc Brake Di2 Shifters: ST-R9170 vs ST-R785

$
0
0
After comparing the mechanical shifting versions, I will now compare the Di2 versions of the road hydraulic shifters. The non series, first generation, Di2 shifter with hydraulic braking is the ST-R785, while the latest second generation is the Dura-Ace ST-R9170.

For Dura-Ace components, being lightweight is very important. Having the best function is also required. In this case, the shifter was totally redesigned to create the new ST-R9170, as compared to the ST-R785.

New Dura-Ace ST-R9170 weighs only 160 grams per side, giving a total weight of just 320 grams per pair.

Non series ST-R785 weighs 254 grams per side, giving a total of 508 grams per pair, which is significantly heavier.

Rubber hood has a different texture, with the "waffle" pattern used on the new ST-R9170 (right side).

Comparing the side profile, the ST-R9170 is obviously lower in height, which makes it look much more similar in shape and size to the other Dura-Ace road shifters.

Dura-Ace ST-R9170 is lower in height, while the lever shape is also curved outwards to match the other mechanical road shifters.

ST-R9170 on the left looks very similar to other road shifters, while ST-R785 has a large silver cover which gives it a very distinctive look.

ST-R9170 on the left has slightly larger Di2 buttons and a stronger click feeling, for an improved tactile feel.

Rear of the lever is where the mechanism for the buttons are housed. ST-R9170 on the right has a cleaner look as the parts are all black in colour and more concealed.

ST-R785 on the left has a lever stopper on the Bracket, while the wire can also be seen. ST-R9170 improves on these with a reach adjustment bolt at the bottom and hides the wire, while the rubber hood texture has also been changed.

Rear view shows that the new ST-R9170 (right side) has a wider Bracket, and uses a titanium Clamp Band for lighter weight.

Internal profile of the ST-R9170 rubber hood. Due to the multiple protrusions as shown, and the many ribs on the Bracket, it was very difficult to remove and install the rubber hood.

ST-R9170 on the left has many ribs on the resin Bracket for weight savings, while ST-R785 on the right uses an aluminium Bracket.

The Di2 unit is smaller in size on the ST-R9170 (left side), while it is also located more rearwards for easier access. Also note the different wire routing through the Bracket.

Another major difference is the pivot location of the brake lever. ST-R785 on the left has a high pivot, while ST-R9170 has a pivot location that is lower and similar to other mechanical or Di2 road shifters. This allows the brake lever ergonomics to be similar to other Dura-Ace shifters.

The bleeding port for ST-R9170 (left side) is located in the middle of the Bracket (black bolt), while the ST-R785 bleeding port is right at the front of the Bracket. The little bump at the front of the ST-R9170 bracket is the top button which can be programmed.

This side by side picture shows how different the Bracket design is, as well as the different hydraulic design.

This new generation ST-R9170 is a significant improvement over the first generation ST-R785, with the major improvements being lower weight, smaller size, and a more conventional braking ergonomics. There is also an additional button on top for extra customization.

Canyon Endurace: Dura-Ace R9170 Hydraulic Brake Calipers and Rotors

$
0
0
With the new Dura-Ace groupset, it now includes road hydraulic disc brakes, and has its own series of hydraulic disc brake calipers and rotors. For Dura-Ace, the focus is on providing lightweight, high performance, race ready components. After checking out the ST-R9170 Di2 shifter with hydraulic brakes, let's take a look at the brake calipers and also the brake rotors in this post.

The new mounting standard for road disc brake calipers is the Flat Mount standard, which puts the brake calipers closer to the frame for a neater look. As such, the brake calipers look quite different from traditional MTB style brake calipers, such as the BR-RS785 brake calipers used on the Avanti Inc 3.

Dura-Ace Flat Mount hydraulic disc brake calipers

BR-R9170 is the model number of this Dura-Ace brake caliper

Yellow block in between the pistons are for bleeding the brake caliper. The brake pads will be installed later on.

The front and rear brake calipers are actually the same, but the hardware that is supplied is different due to the different mounting methods for the front and rear.

For the front brake caliper, it has an overall weight of 136 grams when installed on the bike. See how many loose parts there are!

The front brake caliper requires an adapter for running with either 140mm or 160mm disc rotors. What is clever is that this adapter can simply be reversed to achieve either sizes.

Flipping the adapter to the other side will move the caliper position upwards, to make it suitable for the larger sized 160mm rotor.

When used for 140mm rotor, the brake caliper will be situated lower on the front fork to match the smaller rotor diameter.

When used for 160mm rotor, the brake caliper is located higher up on the front fork.

Hardware that comes with the rear brake caliper. Still quite a lot of loose parts that need to be assembled. Weighs 126 grams in total.

Two long bolts for securing the brake caliper to the left side chain stay, along with a safety pin to prevent the bolt from dropping out completely if it happens to loosen.

For the rear, an additional adapter is needed if 160mm rotors are used. Else the brake caliper can just be bolted directly to the frame for 140mm rotors. In my case, I will just use the original adapter that came with the bike, which has a stock rotor size of 160mm.

New brake pad design that is used for the Flat Mount disc brakes. It has a slightly smaller pad area as compared to normal brake pads.

Brake hose bolts, olives and connecting inserts for use with BH90 hydraulic brake hose. I had to obtain these separately as they are not included if you order the shifters and brake calipers separately.

Other than the new Dura-Ace brake calipers, there are also new Dura-Ace disc rotors! These new rotors have a unique appearance unlike no other disc rotor.

Dura-Ace grade disc rotors, SM-RT900

4 arm aluminium spider, together with the gigantic black cooling fins that takes up the rest of the space within the rotor.

S size refers to 160mm diameter. SS is for 140mm.

As shown here, it has a diameter of 160mm

Ice-Tech design with the logo printed on the rotor

Some unevenness of the black colour at the edges, only noticeable if you look closely

Slightly chamfered edges, which supposedly makes it safer

Weighs 118 grams each for the 160mm size, without lock rings.

Very premium looking lockring, befitting of the Dura-Ace grade rotor

Lockring is very lightweight at only 7 grams each

Each set of rotor plus lockring is thus 125 grams, which is a decent weight. One bike's worth of rotors would thus be 250 grams.

As for the hydraulic brake calipers, one pair of brake calipers would be 262 grams. Overall, the disc brake calipers and rotors would add 512 grams to a bike.

R9150 Di2 Shifter with mechanical brake + R9100 mechanical brake calipers: 226 + 321 = 547 grams
R9170 Di2 Shifter with hydraulic disc brake + R9170 hydraulic brake calipers and rotors: 320 + 512 = 832 grams

Between the hydraulic and mechanical brake version, the hydraulic version adds about 300 grams to the overall system. This is assuming that all other components are the same.

Canyon Endurace: Dura-Ace R9100 Cassette and Crankset

$
0
0
After introducing the new Dura-Ace road hydraulic components, it is time to round off the groupset with the rest of the parts. Although the new Dura-Ace comes in four different "flavours" for shifting and braking (Mech/Mech, Mech/Hydraulic, Di2/Mech, Di2/Hydraulic), the crankset, cassette and chain are the same for all of these different setups.

For the chain, there is nothing new about the new Dura-Ace chain, the CN-HG901. It is actually a Dura-Ace/XTR grade chain that is also compatible with the 11 speed MTB drivetrains from Shimano.

Let us now look at the Dura-Ace 11 speed cassette CS-R9100, followed by the new Dura-Ace crankset FC-R9100.

For this new R9100 generation of Dura-Ace, there is an additional cassette combination that is available, which is the 11-30T cassette. This cassette has just a little bit more low end gearing, as compared to the most commonly used 11-28T cassette.

This is the cassette that I chose to get, in order to get a good low gear that will help me in climbing up steeper slopes. As Dura-Ace does not officially support a 32T low sprocket (found on the Ultegra 11-32T cassette), 30T is the lowest sprocket that can be used.

Dura-Ace 11 speed cassette CS-R9100, available in these combinations. Mine is 11-30T.

Unboxing the cassette! Held in the box with a layer of cling wrap.

Shiny new Dura-Ace cassette! It makes me happy to see a clean cassette.

11-30T laser marked onto the cassette spider.

For this cassette, the last two gears (27T and 30T) are riveted together onto the aluminium spider.

The next three gears (19T, 21T, 24T) are riveted together onto the carbon fibre spider, similar to the previous Dura-Ace CS-9000 cassette.

Carbon fibre spider is used for gears 3 to 5 to save weight.

The special rivet layout that seems to provide greater strength and support for adjacent gear sprockets.

Aluminium spider with the titanium 27T and 30T sprockets weigh 64 grams.

Carbon fibre spider with the titanium 19T, 21T and 24T sprockets weigh 59 grams.

Lightweight aluminium lockring only weighs 5 grams

The three lightweight aluminium spacers weigh 5 grams in total

Whole 11-30T cassette weight is 206 grams, which is on the slightly heavier side due to the larger sprockets which of course weigh more. The 11-25T CS-9000 weighs only 176 grams.

As far as I can tell, there is no major change in the sprocket design as compared to the previous generation of CS-9000, just an additional 11-30T specification.

Next, let's look at the new Dura-Ace R9100 crankset. For this crankset, I decided to get a length that is shorter than the commonly used 170mm crank arm length.

In the industry or market, the most common crankarm length is definitely 170mm. This is a standard length that will fit the greatest number of people. Larger sized frames will come with longer crank arms, such as 172.5mm or 175mm.

However, according to my personal experience and also some research that I have done, it seems that a shorter crankarm length may be more suitable for me. I first tried a shorter 165mm crankarm length on the Merida Scultura road bike, followed by on the Avanti Inc 3.

I liked the 165mm crankarm length as it allows me to raise the saddle higher by 5mm, and also allows the hip angle to be larger when using the drops. All these changes improves the pedaling efficiency, with no downside. Based on my experience, 165mm is good. What about the research supporting this?

http://bikedynamics.co.uk/FitGuidecranks.htm

Referring to the research from the link above, with my inseam and height, different bike fitting methods all point to a crankarm length of 165mm that is ideal. There is potentially some gains to be found from a more comfortable and efficient pedaling position, and basically no disadvantage for me to use a 165mm crankarm as compared to 170mm.

Research and personal experience both points to 165mm being more suitable for me, which is why I decided to get a 165mm crankarm which surprised quite a few people.

Dura-Ace 11 speed compact crankset (50/34T) in 165mm length

Smart looking crankset, with the new black colour that will match almost any bike.

Interesting colour gradient, with black in the middle slowly fading out to grey towards the outside of the chainring.

Super chunky right crankarm, literally joining up with one of the four arms on the crank

Colour gradient on the Hollowglide chainring

Hollow area behind the crankarm is concealed, much like the Dura-Ace 9000 but different from Ultegra 6800.

Left crankarm does not look so different, although the black colour is nice and shiny with a good looking appearance.

Very shiny surface treatment on the crankarm

No more sharp edge at the rear of the crankarm where the front and back portions are bonded together.

The bond line is visible here, as indicated by the silver line.

Right side of the crankset weighs 434 grams

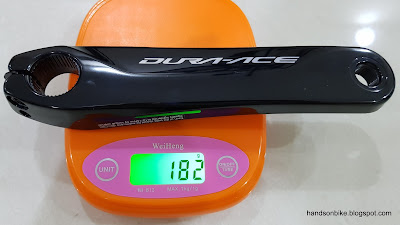
Left side crankarm plus crank arm fixing bolt weighs 175 grams

In total, this 50/34T crankset with 165mm length weighs just 610 grams (rounding off error). This is the lightest specification with the smallest chainrings and shortest crankarms.

With this new cassette and crankset, the gear range will be slightly affected. As shown in the table below, the top end gear range is reduced slightly, with the low end gear range maintained. Out of these 2x11 speed gears, there are 14 unique gear combinations as shown by the blue highlighted boxes.

One thing to note is that the new Dura-Ace Di2 locks out cross-chain combinations electronically, making it impossible to shift into those extreme cross-chain combinations (Eg. front low, rear top). I will learn more about this when I install the whole system onto the bike.

Gearing comparison of the previous vs new drivetrain

Wait a minute, why are there two Dura-Ace left side crankarms?

Guess what, I bought a left side power meter from 4iiii! 165mm length on Dura-Ace R9100 left crankarm to match the crankset.

This new Dura-Ace crankset is very similar in weight as the previous generation, while improving the stiffness with the chunky right crankarm construction.

With the left side power meter from 4iiii, I will be able to get one sided power data on this bike, which is useful to gauge how much effort I am putting in versus the speed. Useful to have for more objective comparison or testing, or even training (although that is not my purpose).

Now, what do I do with the extra left side Dura-Ace crankarm...

Canyon Endurace: Dura-Ace Di2 R9150 Front and Rear Derailleur

$
0
0
I first started using the Shimano Di2 electronic shifting system on the Dahon Boardwalk, with the Ultegra Di2 6770 groupset. From there, I have installed quite a few more Di2 systems on my bikes.

Dahon Boardwalk Ultegra Di2 6770
Dahon Boardwalk Ultegra Di2 6870
Dahon MuEX Ultegra/XTR Di2
Wheelsport Fantasy Mini Velo Ultegra Di2 6870
Merida Scultura 5000 Ultegra Di2 6870
Avanti Inc 3 Alfine 11 Di2

Once you have tried electronic shifting, it is hard to go back to mechanical shifting, as the shifting force is so light, and the buttons are easy to activate with just one finger.

The Canyon Endurace comes with the Ultegra Di2 6870 groupset, which is a great Di2 groupset. However, my intention all along was to upgrade the components to the latest Dura-Ace R9170 when they became available. Let's take a closer look at the Di2 rear derailleur and front derailleur to see how different it is from the previous generation.

For the rear derailleur, the main difference is the new construction design. From the double servo construction of previous road rear derailleurs, the latest R9150 Di2 rear derailleur is now using the Shadow construction of MTB rear derailleurs. This lowers the profile of the rear derailleur, reducing the amount which the derailleur sticks out from the side of the bike. You can see the design of the previous generations here.

Shadow construction used for the new Dura-Ace Di2 R9150 rear derailleur. Servo motor is located at the rear and looks really small.

Weighs only 197 grams, including the motor! Lightweight materials are used throughout the whole component.

Extra link to shift the pivot of the derailleur rearwards, allowing for a Shadow construction.

E-tube port for connecting the Di2 wire is hidden behind, for a minimal profile.

B-tension screw and the two limit screws are located just beside the motor, and are adjusted using Allen keys and not screwdrivers.

Very industrial design with the cover of the motor following the shape of the internal parts of the motor and gearbox.

Tall toothed guide pulley to improve shifting speed and accuracy

Short toothed tension pulley to minimize running noise when cross-chained.

Carbon inner and outer plates minimize the weight but increases the cost considerably.

Bottom side of the derailleur. Rivets are capped with a black sticker for a nicer appearance.

Upper side of the derailleur. The saver unit has been moved from the bottom (previous generation) to the top, probably due to the change to Shadow design. This is the position during normal operation.

If the derailleur receives an impact from the side, the saver unit will give way and disengage from the motor, as shown here. This prevents damage to the motor unit.

With the change of construction, this rear derailleur looks and operates quite differently from the previous generation of Di2 rear derailleur. More findings will be shared after installation to the bike.

As for the front derailleur, it remains largely unchanged from the previous generation, at least in terms of external appearance.

Dura-Ace Di2 R9150 front derailleur. The little black plastic piece shown at the side is the cap for covering the Di2 wire.

The Di2 wire connection is now facing the rear of the bike.

To use the cap, first insert the Di2 wire into the cap, and use it to insert and remove the Di2 wire from the front derailleur. This cap also protects the port from water and dirt.

Front derailleur weighs 102 grams, not much heavier than a mechanical front derailleur.

The main appearance surface of the front derailleur

Inside surface of the front derailleur

Rear end of the front derailleur, where the rivets can be seen

Front end where the black clamp bolt can be seen

The grey inner link seems to be made of titanium, as it is not attracted to a magnet and does not look like aluminium.

The biggest surprise for me is how lightweight the Dura-Ace Di2 front and rear derailleurs are. With a combined weight of only 300 grams, they are super lightweight, and it includes the motor!

Canyon Endurace: Actual Weight of Frame, Fork, Handlebar

$
0
0
Even before I got the Canyon Endurace CF SLX Disc 8.0 Di2 bike, the final plan was to upgrade it to the latest Dura-Ace R9170 groupset, which has hydraulic disc brakes and Di2 electronic shifting. However, at that point in time (July 2017), the latest R9170 groupset was not available yet, while there was a 20% discount on this Canyon bike which was very enticing. Therefore, I decided to get the full bike that was equipped with Ultegra Di2 and hydraulic disc brakes first, before upgrading later.

Now that my Dura-Ace R9170 groupset has arrived, I can begin upgrading the bike! Since I will need to disassemble 90% of the components from the bike for the upgrade, I might as well disassemble it 100% to check out the actual frame weight. This is a good chance to compare and see how it differs from the claimed weight on the Canyon website.

This is the top level Endurace CF SLX Disc frameset, which is designed for Di2 shifting. The mechanical shifting version of the frame is slightly different to account for the cable routing required. Without further delay, let's take a closer look at all the frameset components!

Beautiful Canyon Endurace CF SLX Disc frame, in an eye-catching Kerosene Red colour.

It comes in at a lightweight 807 grams for a size XS frame. Includes weight of seatpost clamp and rear dropout hanger. Claimed weight is 820 grams for Size M.

Mounting point for the rear Flat Mount disc brake caliper is located on the left side chainstay.

Bearing cups for the headset (both top and bottom) are molded into the frame to save weight

Internal view of the downtube, viewed from the bottom bracket shell opening.

The inside of the left and right chainstays, as viewed from the opening under the bottom bracket shell.

Weight of headset bearings (top + bottom + plastic compression ring) is just 37 grams.

Front fork with carbon steerer tube

Even the crown race for the lower headset bearing is molded as part of the steerer tube

Actual weight of the front fork is 361 grams, quite a bit heavier than the claimed weight of 325 grams.

Integrated carbon handlebar and stem, comes with this Canyon bike.

No holes on the handlebar for internal routing, but there are cable channels on the underside of the handlebar.

Total weight of 90/400mm handlebar +  stem and the clamp (which presses on the steerer tube) is 327 grams. Claimed weight is 335 grams for the 100/420mm version.

Headset top cap and special shaped spacers weigh about 49 grams. 

With these numbers, the frameset (frame + fork) weighs 1168 grams, which is a really nice weight for a road bike frame. There are of course lighter framesets such as the Trek Emonda, but the cost of one of those framesets can almost buy my whole bike.

As for the one piece carbon handlebar (327 grams), it is not actually lighter than a separate handlebar and stem combination. For example, if I use a FSA K-Force Compact Road Handlebar (204 grams), with the Controltech Alloy Road Stem (80mm, 112 grams), the total weight is 316 grams which is actually lighter and cheaper than the one piece handlebar.

Anyway, the objective is not to build a super lightweight road bike. If this was the objective, the starting point would be very different. With this endurance frame, the idea is to build a road bike with hydraulic disc brakes and Di2 shifting, while ensuring that it is comfortable to ride without being too harsh. Of course, if it can also be fast and lightweight at the same time, that will be the best.

Canyon Endurace: Customizing Dura-Ace Di2

$
0
0
After waiting patiently, the time has come. I have finally gathered all my Dura-Ace components that will be installed onto the Canyon Endurace. Before that, I will connect up all the Di2 components to test it out, before installing it. At the same time, I will take the chance to update and customize the Di2 components. In this new generation of Di2 components, there are some new features that I have not tried before. Let's check it out!

Full Dura-Ace R9170 groupset! Hydraulic disc brakes with Di2 electronic shifting.

The new EW-JC130 Di2 wire with a Y split junction. This comes in 3 different lengths, and is designed for internal handlebar routing.

Just for future reference, this Y split Di2 wire weighs just 8 grams

Wireless unit EW-WU111, which installs inline along the Di2 wire route, and is much smaller in size compared to the previous version SM-EWW01.

Super light at just 3 grams

The Y split Di2 wire is used to link the two Di2 shifters together, and connects to the inline wireless unit.

As you may have noticed, this is not the usual wiring layout that is used on road bikes. Normally, there are two separate wires that link the two shifters to Junction A, which resides underneath the stem. From there, a long Di2 wire then links Junction A to Junction B, which is usually at the bottom bracket area.

However, I wanted to hide Junction A instead of having it underneath the stem. Hopefully, this will give a cleaner wiring layout. If the handlebar was suited for internal wiring (with holes for Di2 wires to enter and exit), I would have got the Junction A for drop bars (EW-RS910), but since the stock Canyon aero handlebar cannot run internal wiring, this is the next best solution.


The custom Di2 wiring layout that will be used on the Canyon Endurace

In this custom layout, Junction A will be located at the seat tube area, and wired in between the front derailleur and Junction B. As this is not the officially recommended layout, I had to test it out before installing it on the bike.

Junction A which comes stock on the bike. The bracket on the left is the original one from Shimano, while the one on the right (with countersunk hole) is a special one designed by Canyon to mount Junction A under the stem.

Junction A with original bracket and rubber strap. Weighs 13.5 grams.

Di2 internal battery, with a custom bracket designed by Canyon to mount it inside the downtube of the frame. Weighs 62 grams including the bracket.

Junction B as it comes stock with the bike. Wrapped up in foam tape to prevent it from rattling inside the downtube.

Weighs about 6 grams with the foam tape

All the Di2 wires that will be used on the bike. About 36 grams in total.

Note that almost all the Di2 wiring is already present as the bike came stock with Ultegra Di2. Since I am reusing the Di2 wires, Junction A and B and also the internal Di2 battery, I can also see how it was mounted from the factory.

Wiring up everything to test it out. It works perfectly! The Garmin Edge 510 has also been connected to the Di2 system using the wireless unit.

Using the SM-PCE1 PC Linkage Device to update and customize all the Di2 options

With the new Di2 internal battery and the latest firmware update, synchronized shifting is now possible!

As shown above, there are two synchronized shifting modes available. Semi-synchronized shifting mode means that when you manually shift the front, the rear will automatically move up or down to compensate for the big gear jump at the front.

As for full synchronized shifting, it means that only one shifter is needed. As you shift along the rear cassette, it will reach a point where the front shifting will occur automatically, and at the same time, adjust the rear derailleur to ensure that the next higher or lower gear ratio is selected.

Gear mapping for full synchronized shifting mode.

Looking at the green and blue arrows, you can see that the shifting points are different for upward shifting and downward shifting. These shifting points can be changed as you like, making it truly customizable for the individual.

With this full synchronized shifting mode, you can get 14 distinct gears out of this 2x11 speed drivetrain, using just a single shifter.

These are interesting modes of shifting which I can try out, after I have installed the components onto the bike.

Canyon Endurace: Installation of Dura-Ace R9170 Components

$
0
0
Finally, after taking a detailed look at each of the new Dura-Ace components, and also the Canyon Endurace frame, it is now time to install everything onto the bike!

From a bare frame, it takes quite a bit of work to assemble all of the components. The most tricky and troublesome part are the hydraulic disc brakes, which takes some time and also requires other people to help with the bleeding of the brakes.

Full Dura-Ace R9170/R9150/R9100 groupset that will be going onto the bike!


Dura-Ace R9100 11 speed 11-30T cassette installed onto the rear wheel

Front hydraulic disc brake caliper with adapter

Dura-Ace bottom bracket, press fit type SM-BB92

New 11 speed chain CN-HG901. I did not reuse the stock 11 speed chain as it went onto the Dahon MuEX along with the cassette, rear derailleur and crankset.

There are no photos of the installation process, as my hands are usually working on something, or is greasy or oily. What you will see here is the final result of the full bike assembly.

Integrated handlebar and stem, with shifters installed, bar tape wrapped and Garmin in position.

Front view


Comparing the geometry to my other hydraulic disc brake bike, the Avanti Inc 3, the reach is actually a little bit shorter!

Junction A located at the front of the downtube, in an unconventional place.

Rear hydraulic disc brake caliper with adapter for 160mm rotors

Front hydraulic disc brake caliper, also with adapter for 160mm rotors

Big and chunky Dura-Ace R9100 crankset! 50/34T compact size, with 165mm crank arm length.

Dura-Ace Di2 front derailleur

Dura-Ace Di2 rear derailleur, with Shadow construction for a low profile

Overall view of the 2x11 speed Dura-Ace drivetrain

Fresh bike build with no accessories such as bottle cages or lights installed. With all components being black in colour, the frame colour really stands out!

Clean cable routing, with the cable or wires visible only in between the stem and the head tube. Relocating Junction A away from the stem did make it look a bit neater, but not by much.

Outdoor full bike shot, with all the usual accessories installed

Full bike specifications and weight

The theoretical full bike weight (without pedals) is about 6.9 kg, which is a bit different from the actual weighed value of 7 kg. Not a big issue at all, as this is still a lightweight bike! More so given that this is a hydraulic disc brake setup, which is roughly 300 grams heavier than a mechanical brake caliper setup.

The only place where significant weight can still be shaved will be from the wheelset, where a tubular wheelset can reduce maybe another 300 grams. Weight savings from other components will be minor and not really cost effective.

With such a nice road bike setup, the limiting factor is not the bike but the rider, as it is most of the time. Although I am not a pro rider or even a high mileage rider, I can still appreciate riding a good road bike.

Some people have this theory that if you don't ride so often, you don't need such a good bike. However, I feel differently. If I don't ride so often, then every ride is precious and I would like to ride a good bike on these rides! Life is too short to waste on riding lousy bikes, so if you can, get a nice bike that you can afford and ride it well.

Canyon Endurace: 4iiii Precision Power Meter on Dura-Ace R9100 Crankarm

$
0
0
In recent months, I decided to get a powermeter to use on my bike, in order to gauge my effort numerically. Although I can generally feel the resistance, and roughly tell whether it is a "strong headwind" or me having an off-form day, it is more accurate to have a powermeter to show the actual wattage used during the ride.

The speedometer can tell you the actual speed, but it cannot indicate how much effort is used to travel at that speed. When you are moving fast, it can be due to you pedaling hard, or it is just the benefit of having a good tailwind. On the other hand, when you feel that you are moving slowly even though you are putting in considerable effort, it can be due to tiredness or something else (such as slight uphill, slight headwind or rubbing brakes, for example).

With a powermeter, it will be easy to tell the power required to sustain a certain speed. Most people use powermeters for training purposes, so that they can gauge their effort and stick to their training plan. However, I only intend to use it to collect some data, not for training.

There are many brands and types of powermeters available, such as pedal type, chainring type, rear hub type, crank arm type, etc. I decided to get a simple one-sided powermeter, as I don't need the accuracy of a dual-sided powermeter.

For one sided power meter, Stages and 4iiii are the more popular ones available, with a similar cost. Stages came out with the left crank arm powermeter first, but they have been having some quality issues from what I heard. Therefore I decided to get the 4iiii power meter which is also a left crank arm type.

Installation is as straightforward as it can be, as you basically just replace your existing left crank arm with the one from the 4iiii factory, which has already been fitted and calibrated with the strain gauges on the left crank arm. It is also possible to send in your existing left crank arm for them to install the power meter, but that may be too much trouble especially if you are located halfway around the world.

4iiii Powermeter, which claims to be the lightest left side powermeter.

Set up instructions are printed on the inside of the box.

As I plan to install the powermeter on the Canyon Endurace road bike, I got a crankarm that matches the groupset. As already done earlier, the Dura-Ace R9100/9170 groupset has already been installed on the bike, therefore I need to get the model that uses the Dura-Ace R9100 left side crankarm.

When I ordered the powermeter, the crankarm was not in stock, so I had to wait about a month before I received it. Here it is!

Dura-Ace R9100 left side crankarm

Super glossy surface finishing as seen here

4iiii sensor glued to the back of the crankarm. Most of the bulk is actually taken up by the coin type battery.

Relatively low profile, should clear most chainstays, unless your bike has a special chainstay profile.

165mm length to match the right side crankarm

Battery cover taken off to show the battery. Easily replaceable when it runs out of power.

Weighs 182 grams including the sensor! The regular crankarm without the sensor weighs 173 grams, so the sensor weighs just 9 grams. Super lightweight powermeter indeed.

Sufficient clearance between the sensor and the chainstay. 

Installation is easy, just use this crankarm with powermeter instead of the normal one that comes with the crankset. After that, link it to your cycle computer via ANT+, then calibrate and zero the powermeter as per the instructions.

From the data, I can see that it takes roughly 130 watts to pedal at 30km/h on the Canyon Endurace, on flat ground and no wind, and without drafting. To go at 40km/h will require about twice the power! I can only sustain this power over a short stretch.

Pro cyclists regularly cycle at over 40km/h, which means that their power output will normally be 200 watts or more. This is already accounting for the drafting effect when riding in a group.

In a way, having this data helps you judge your pedaling effort and how much more you need to go faster. For example, if I want to sustain 35km/h instead of 30km/h, I will need to raise my power output from 130 watts to 180 watts! That is a big jump and it will take a lot of training to sustain this power for a meaningful amount of time.

However, if you are drafting, you can save about 30% of your energy if you do it correctly. Therefore, if you are drafting behind somebody, you can go at 35km/h while using about 130 watts. In other words, if you can output 130 watts, you can ride at 30km/h solo, or 35km/h when drafting.

The best part about this powermeter is that it is super low maintenance and fuss free. The battery lasts a long time, and there is no need to calibrate or pair it every time you ride. It is also very lightweight and small sized, and is hardly visible on the bike.
Viewing all 697 articles
Browse latest View live